Thematic Approaches to Bathroom Wall Art Decor
Bathroom wall art decor – Choosing the right wall art can transform your bathroom from a functional space into a personal sanctuary. A cohesive theme elevates the overall design, creating a visually appealing and relaxing environment. This section explores different thematic approaches, providing practical examples and guidance for creating a stunning bathroom art display.
Thematic Approaches and Their Visual Elements
Selecting a theme is the first step in curating your bathroom’s aesthetic. This involves considering both the art style and the color palette to ensure a harmonious look. The following table illustrates three distinct thematic approaches, their associated art styles, and suitable color palettes.
| Theme | Art Style | Color Palette |
|---|---|---|
| Nautical | Watercolor paintings of seascapes, nautical charts, framed seashells, minimalist line drawings of boats | Blues, greens, whites, creams, sandy beige |
| Botanical | Botanical prints, watercolor flower illustrations, pressed flower art, photography of lush foliage | Greens, pinks, yellows, creams, soft browns |
| Minimalist | Abstract geometric prints, monochromatic line art, simple black and white photography, single-color canvases | Neutral tones (whites, grays, beiges), a single accent color (e.g., deep teal or blush pink) |
Bathroom Wall Art Ideas Incorporating Natural Elements
Natural elements bring a sense of tranquility and serenity to the bathroom. These ideas utilize natural materials and imagery to create a calming and refreshing atmosphere.
Here are ten ideas for incorporating natural elements into your bathroom wall art:
- Framed pressed flowers or leaves.
- Photographs of serene landscapes, such as forests or beaches.
- Watercolor paintings of plants and flowers.
- Prints of botanical illustrations from vintage books.
- Macrame wall hangings with natural fibers.
- Driftwood sculptures or arrangements.
- Stone or wood framed mirrors.
- Abstract art featuring natural textures and colors.
- Large-scale prints of natural patterns (e.g., wood grain, marble).
- Ceramic tiles with nature-inspired designs.
Creating a Cohesive Tropical Paradise Bathroom Art Display
A tropical paradise theme evokes feelings of warmth, relaxation, and escape. Achieving a cohesive display requires careful selection and arrangement of art pieces.
To create a visually appealing tropical paradise bathroom, consider these steps:
First, establish a dominant color palette. Think vibrant greens, sunny yellows, turquoise blues, and sandy beige. Then, choose a mix of art styles. Incorporate large-scale prints of lush tropical foliage, smaller framed illustrations of exotic birds or flowers, and perhaps a textured piece featuring a natural material like bamboo or woven raffia. Vary the frame styles and sizes to prevent monotony.
Arrange the pieces strategically, creating a visually balanced display. Consider grouping similar-sized pieces together or creating a focal point with a larger piece. Ensure the overall arrangement complements the bathroom’s existing décor and doesn’t feel overcrowded.
For example, a large-scale print of a vibrant tropical beach could serve as the focal point, flanked by smaller framed illustrations of hibiscus flowers and hummingbirds. A woven raffia wall hanging could add texture and visual interest. Remember to maintain a consistent color palette and art style throughout the display to ensure a cohesive and aesthetically pleasing outcome.
Incorporating Lighting and Mirrors
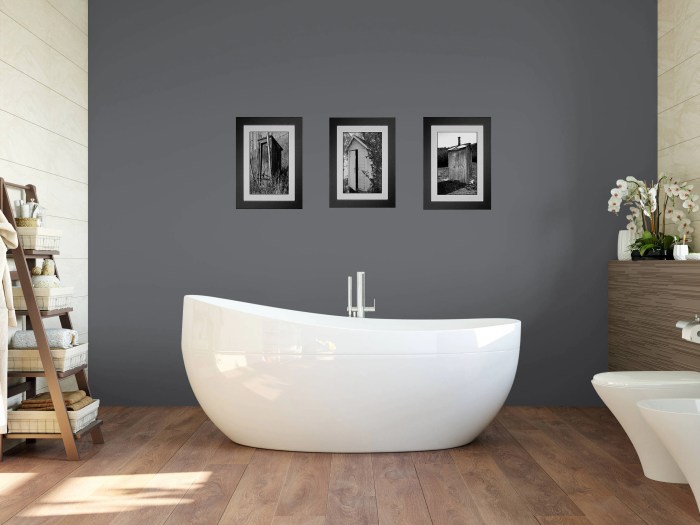
Strategic lighting and mirror placement are crucial for elevating your bathroom’s design and maximizing the visual impact of your wall art. By carefully considering these elements, you can transform a simple bathroom into a relaxing spa-like sanctuary, enhancing both the functionality and aesthetic appeal of the space. This involves understanding how light interacts with art and how mirrors can expand the perceived size and brightness of the room.Proper lighting dramatically enhances the visual appeal of bathroom wall art.
Different types of lighting create different moods and highlight artwork in various ways. A poorly lit piece can appear dull and lifeless, while strategically placed lighting can bring out its textures, colors, and details, transforming it into a focal point. Consider the art’s style and color palette when selecting lighting; warm, soft lighting complements softer art, while brighter, more focused lighting can work well with bolder pieces.
Lighting Placement for Optimal Art Display, Bathroom wall art decor
The placement of your lighting is key. Avoid harsh overhead lighting, which can create unwanted shadows and wash out the colors of your artwork. Instead, consider using recessed lighting, strategically placed spotlights, or even wall sconces positioned either side of the artwork. For instance, a gallery wall featuring smaller framed prints could benefit from a series of small, adjustable spotlights to highlight individual pieces.
A single, larger piece might look best illuminated by a single, larger sconce or a carefully positioned recessed light. Remember to consider the reflective properties of the art itself; highly reflective pieces may need softer, less direct lighting to avoid glare.
Mirror Integration for Space and Light Maximization
Mirrors not only add functionality to a bathroom but also significantly impact its perceived size and brightness. A strategically placed mirror can visually double the space, creating an illusion of greater openness and airiness. Integrating mirrors into your wall art scheme can be done in several creative ways. A large mirror can serve as a backdrop for a piece of art, reflecting the artwork and amplifying its visual impact.
Alternatively, smaller mirrors can be incorporated into a gallery wall, adding depth and visual interest while also reflecting light around the room. Consider using mirrors with interesting frames to add to the aesthetic appeal; a beautifully framed mirror can become a piece of art itself.
Spa-Like Bathroom Design: Art, Lighting, and Relaxation
Imagine a serene bathroom featuring a large, framed botanical print above a vanity. The print depicts lush greenery and calming blues and greens. Flanking the print are two elegant, brushed nickel wall sconces emitting a warm, soft white light. The light softly illuminates the artwork, highlighting its details without creating harsh shadows. A large, rectangular mirror with a minimalist frame is positioned opposite the artwork, reflecting both the print and the soft light, creating a sense of spaciousness and tranquility.
Finding the perfect bathroom wall art decor can be fun! If you’re looking for cheerful, bright ideas, think about the sunny vibe of sunflowers. For instance, you might find inspiration from beautiful sunflower wedding table decor ideas, adapting the bright colors and patterns for a smaller scale in your bathroom. This could translate into a vibrant sunflower print or even a subtle yellow and green color scheme for your bathroom wall art.
This arrangement combines the visual appeal of the artwork with the functional and aesthetic benefits of the mirror and strategically placed lighting, creating a calming and spa-like atmosphere perfect for relaxation and rejuvenation. The overall effect is one of serenity and sophisticated simplicity.
Budget-Friendly Bathroom Wall Art Ideas
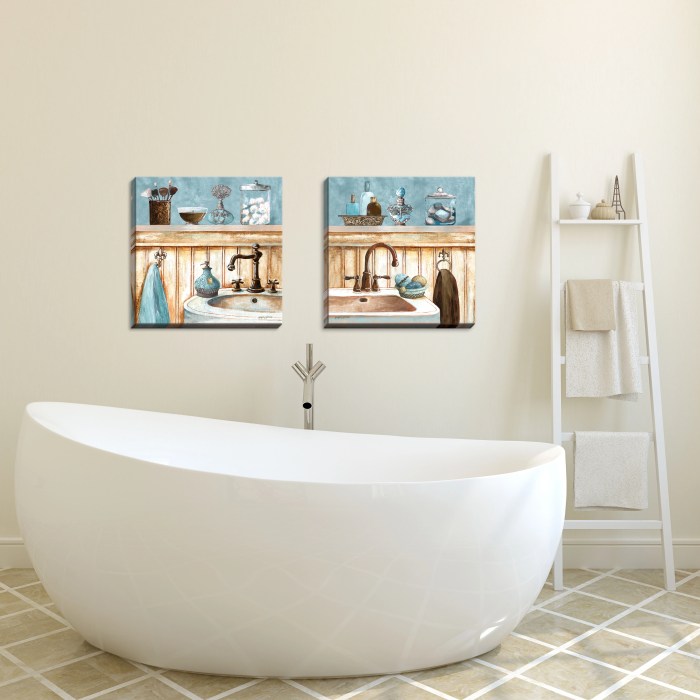
Transforming your bathroom into a stylish sanctuary doesn’t require breaking the bank. With a little creativity and resourcefulness, you can achieve a stunning look using inexpensive materials and DIY techniques. This section explores five budget-friendly DIY bathroom wall art ideas, compares the cost-effectiveness of DIY versus store-bought art, and provides a step-by-step guide for creating unique pieces from repurposed items.
We’ll focus on practical, easily replicable projects that deliver maximum visual impact for minimal financial investment.
Creative and Inexpensive DIY Bathroom Wall Art Ideas
Creating your own bathroom wall art offers a unique opportunity to personalize your space and reflect your individual style. The following five ideas provide diverse options, catering to various aesthetic preferences and skill levels. Remember, the key is to leverage readily available, inexpensive materials and let your creativity guide the process.
- Repurposed Glass Jars: Clean and decorate empty glass jars (from pickles, sauces, etc.) with paint, decoupage, or textured materials. Fill them with colorful bath salts, sea glass, or small pebbles for added visual interest. Arrange them on a shelf or hang them with twine for a charming, eclectic display. The cost is essentially limited to the decorative materials, making this a remarkably cheap option.
- Framed Pressed Flowers or Leaves: Collect interesting flowers and leaves from your garden or local park. Press them between heavy books for several weeks to flatten them. Arrange the pressed botanicals on cardstock or watercolor paper, and frame them with inexpensive frames from a dollar store or craft store. This creates a natural, minimalist look that complements various bathroom styles. The cost is primarily determined by the frame, which can be found very affordably.
- Painted Wooden Coasters: Plain wooden coasters are readily available and inexpensive. Transform them into unique pieces of art by painting them with vibrant colors, geometric patterns, or nature-inspired designs. Use acrylic paints, which are relatively inexpensive and easy to work with. Arrange the finished coasters in a grid pattern on a wall for a cohesive look. This is a quick project with a significant visual impact for minimal outlay.
- Mosaic Tiles: Broken ceramic tiles or inexpensive mosaic tile sheets can be arranged and glued onto a sturdy backing (like a piece of wood or a repurposed mirror frame) to create a custom mosaic. Use grout to seal the tiles and add a protective layer. This project allows for significant creative freedom and can result in a truly unique piece of art.
The main cost here depends on the amount of tile needed.
- Stenciled Wall Art: Choose a simple stencil design (available online or from craft stores) and use painter’s tape to secure it to the wall. Apply paint using a sponge or small brush, carefully removing the stencil once the paint is dry. This technique allows you to create repeating patterns or individual images, adding a touch of sophistication without a large financial investment.
The cost is primarily the stencil and paint, both of which are quite affordable.
Cost-Effectiveness of Pre-Made Art vs. Custom Artwork
Purchasing pre-made bathroom wall art can be convenient, but it often comes at a higher cost compared to creating custom artwork. While pre-made pieces offer immediate gratification, DIY projects allow for greater personalization and cost savings. For instance, a single framed print from a home goods store could cost $30-$50, while the materials for a comparable DIY project (like the pressed flower idea) might cost only $5-$10.
The time investment in DIY is, of course, a factor, but the financial savings can be substantial, especially when decorating multiple walls.
Step-by-Step Guide to Transforming Inexpensive Materials into Unique Bathroom Wall Art
This guide uses repurposed tin cans as an example. This is a simple project adaptable to various materials and styles.
- Gather Materials: Collect empty, clean tin cans (soup cans, coffee cans, etc.). You’ll also need acrylic paints, sealant, a paintbrush, sandpaper (optional for a distressed look), and strong adhesive (like E6000) if you plan to attach the cans to a backing.
- Prepare the Cans: Remove any labels and thoroughly clean the cans. If desired, lightly sand the cans to create a distressed look. This step adds texture and character.
- Paint the Cans: Apply several coats of acrylic paint, allowing each coat to dry completely before applying the next. Consider using multiple colors or creating a gradient effect for a more dynamic look.
- Seal the Cans: Once the paint is dry, apply a sealant to protect the paint and prevent chipping. This is especially important in a humid bathroom environment.
- Arrange and Attach (Optional): Arrange the painted cans on a surface (like a piece of wood or corkboard) to create a desired pattern. Use strong adhesive to secure the cans in place. You can also leave them as individual pieces and arrange them on a shelf.
FAQ Guide
Can I use regular prints in my bathroom?
While possible, regular prints are susceptible to moisture damage. Consider using prints on waterproof materials or applying a sealant.
How do I clean bathroom wall art?
The cleaning method depends on the material. Generally, a soft, damp cloth is sufficient. Avoid harsh chemicals.
What size art is best for a small bathroom?
Smaller, strategically placed pieces are ideal for small bathrooms to avoid overwhelming the space. Consider using mirrors to enhance the feeling of spaciousness.
Where can I find affordable bathroom wall art?
Thrift stores, online marketplaces, and DIY projects offer budget-friendly options. You can also repurpose existing items.


